
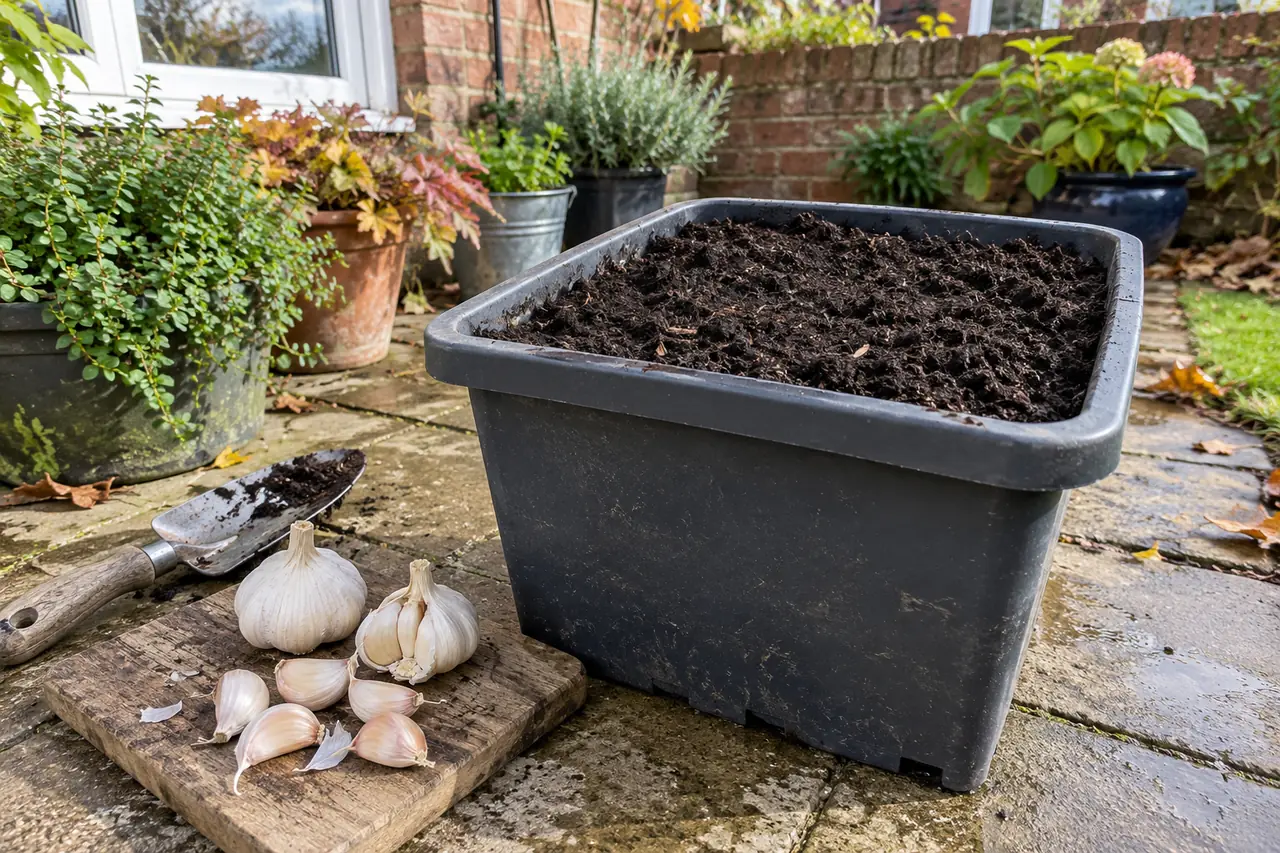
If you cook with garlic, growing a little of your own gives you a choice beyond the bulb on the supermarket shelf. You can pick a variety for its flavour, or one that will keep well after harvest. A sunny patio is enough; you don’t need a vegetable bed.
We’d start with four cloves in one roomy square pot, each of which can grow into a new bulb. Garlic takes its time, so give the pot a sunny spot you can spare until late spring or summer next year.
Choosing garlic to plant
Look for a named variety sold as planting garlic and check that the packet says it’s for autumn planting. ‘Vallelado’ is one choice for autumn or early winter.
You’ll also see garlic described as hardneck or softneck. For a cook, it’s worth knowing which is which. Hardnecks tend to have fewer, bigger cloves and a stronger flavour, and keep for about four to six months after drying. Softnecks have smaller, more tightly packed cloves and generally keep for longer once properly dried. If you’d like a softneck that has proved itself in British gardens, the RHS gives its Award of Garden Merit to ‘Cristo’, ‘Germidour’ and ‘Solent Wight’.
Leave the supermarket bulb for the kitchen. It may not suit our climate and can carry disease. One bulb sold for planting will usually supply enough sound cloves for this pot.
One pot, four cloves
Use a pot you already own if it’s sound, roomy enough and has working drainage holes. A square one makes this planting easy to lay out. Measure it inside: a thick rim can make a pot look bigger than it is. For help with sizes and materials, see our guide to choosing pots.
| Part | Plan |
|---|---|
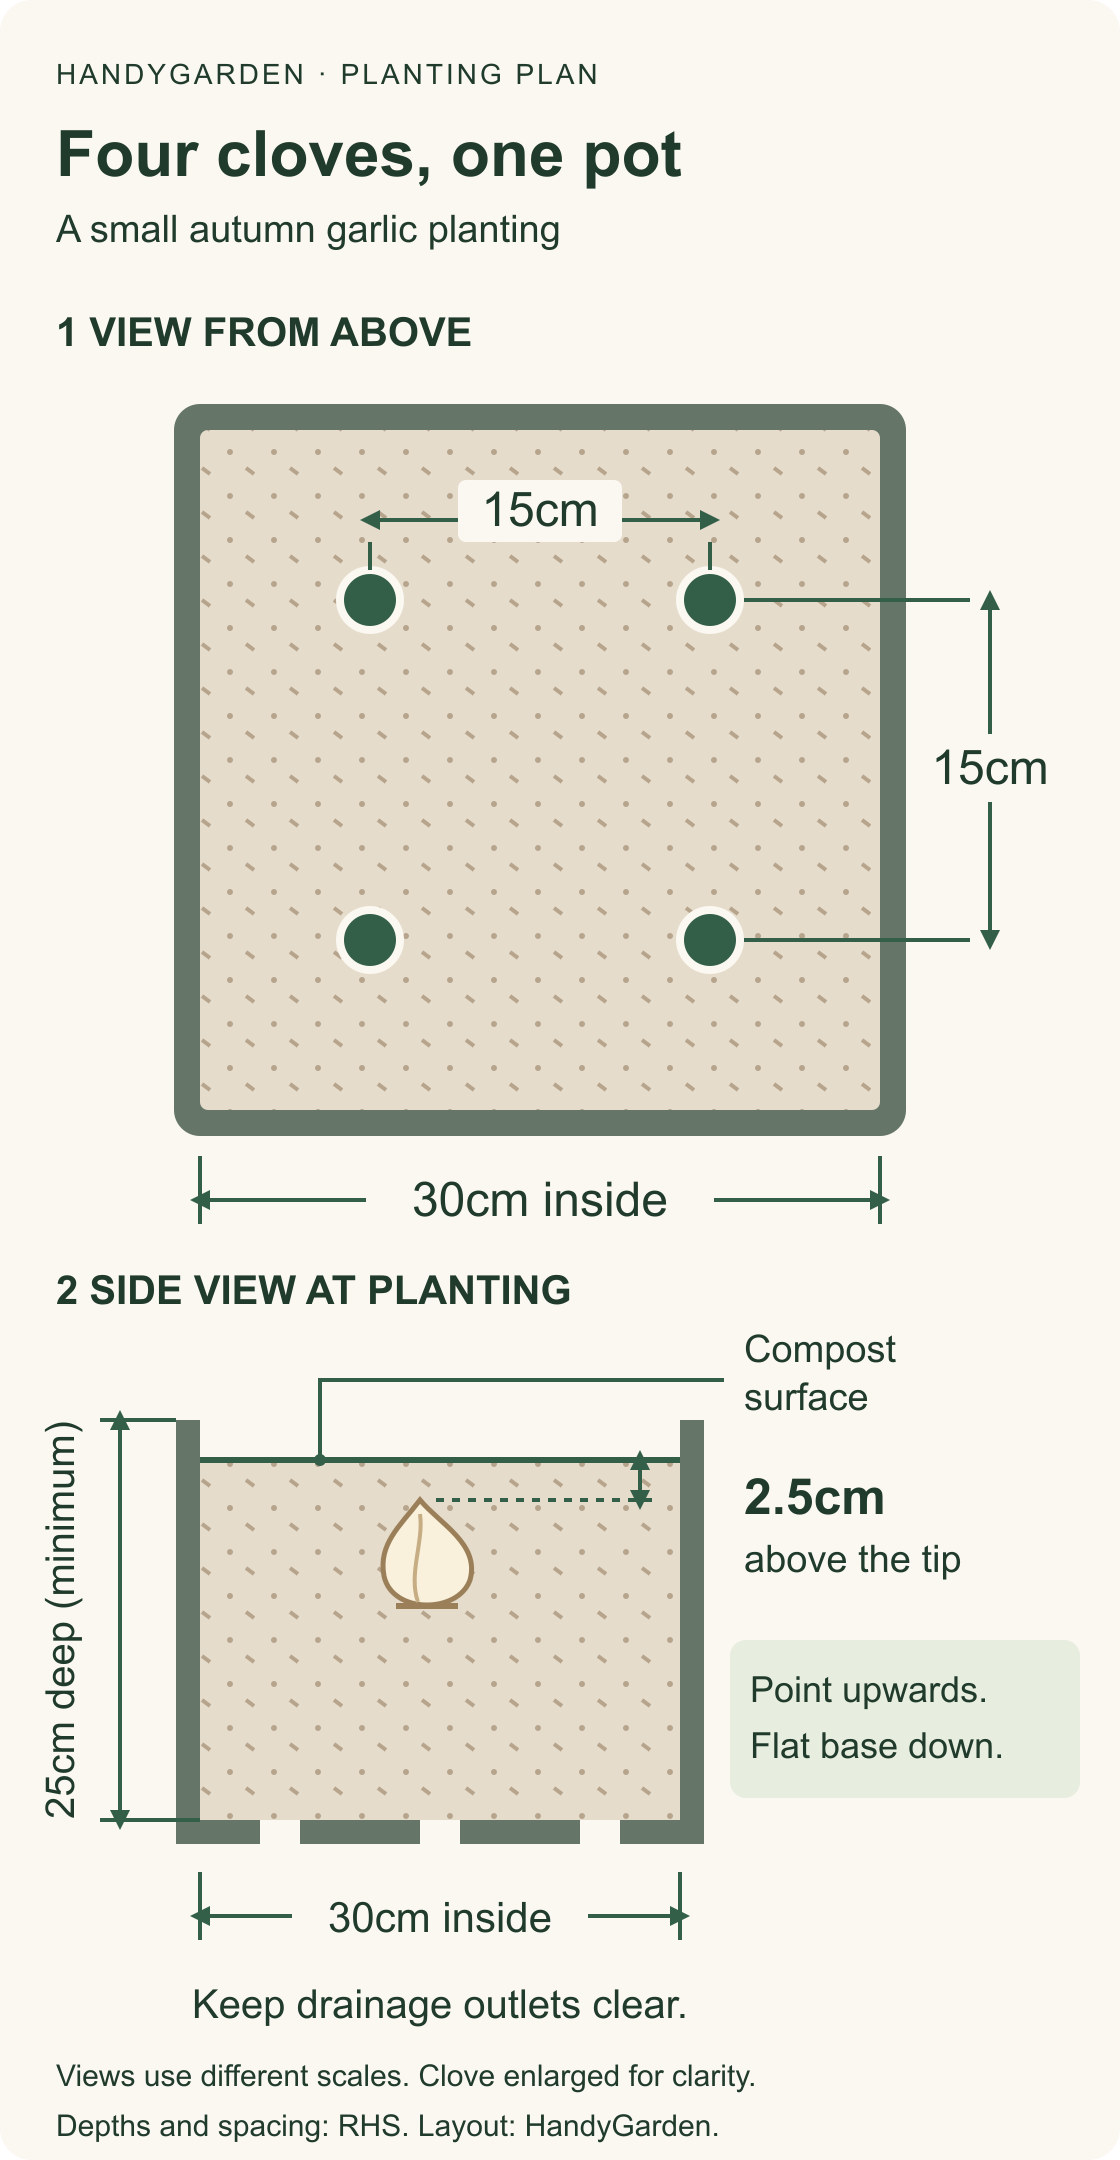
| Container | About 30cm square inside, at least 25cm deep, with open drainage holes. |
| Planting | Four cloves in a square, 15cm apart. |
| Depth | Pointed end up, with 2.5cm of compost above the tip. |
| Growing mix | Fresh peat-free multi-purpose compost, with a small watering gap below the rim. |
If your pot tapers sharply, measure it where the cloves will sit. A smaller pot takes fewer cloves, so don’t squeeze four in against the sides.
Planting the cloves
A useful tip from agronomist Dmitry Zhivoglyad is to keep the bulb whole until planting day, so the bases don’t dry out. Ease the cloves apart without tearing their papery skins or damaging the flat base. Leave the skins on: this is one job where you don’t peel the garlic.
- Prepare the pot in its sunny position. Fill it with fresh compost, settle the mix gently and leave room below the rim for watering. A decorative outer pot without holes can trap water around an inner pot; check the drainage before filling.
- Choose four good cloves. Pick larger, firm ones with intact skins and bases. Larger cloves generally give larger bulbs. Leave soft, mouldy or damaged pieces out.
- Mark the four positions. In a 30cm-square pot, each sits about 7.5cm in from its two nearest sides. Make a hole for each clove and lower it in flat end first, point upwards.
- Cover, water and label. Cover each tip with 2.5cm of compost. Water gently to settle the mix, let excess drain, and label with the variety and planting date.
Use bagged potting compost rather than filling the container with homemade garden compost alone. For help choosing a bag, see our guide to peat-free compost for pots.
Winter care
Then leave it outside and let winter get on with it. As The Garlic Farm explains, garlic needs a spell of cold to form bulbs.
Check the compost before watering, even after rain. Light showers may wet only the top few centimetres; a pot under the eaves may get none at all. Take the saucer away for winter so it can’t hold water around the pot.
What to check as the garlic grows
The surface looks dry. Feel the compost about a third of the way down, near the edge and away from the cloves. If it’s still moist, wait. If it’s dry, water slowly onto the compost and stop as soon as water appears at the drainage holes.
The compost stays sodden after rain. Look for blocked holes or water caught in an outer pot. Empty the trapped water and clear the holes. Don’t water again until the mix has dried a little.
A clove has turned up on the surface. Birds sometimes pull newly planted cloves out. If it’s still firm and undamaged, replant it at the right depth. If this keeps happening, secure horticultural fleece over the pot until the cloves have rooted.
Spring care
As growth picks up, check moisture more often: the bulbs need water as they fill out, and a pot can dry quickly. Feed in late winter or early spring, before the bulbs start to swell. Use a feed suitable for garlic in containers and follow its label. Pull small weeds by hand before they become established.
If you’ve chosen a hardneck, there’s something for the kitchen before the bulbs are ready. Look for a curling flower stalk, called a scape, and snip it off while the flower is still in bud, so the plant puts its energy into the bulb. Don’t throw it away: cook the young stalk gently in butter, roast it or add it to a stir-fry.
Harvesting and drying
Once the bulbs are well formed, stop watering. As your variety’s harvest time approaches, watch the lower leaves. When the first four to six turn yellow, check a bulb by easing the compost away from its side before lifting the crop. A few yellow tips earlier in the season don’t mean the garlic is ready.
Loosen the compost and lift gently rather than tugging on the stems. Spread the bulbs in a single layer somewhere dry and airy under cover, such as a shed or sheltered porch, with the foliage still attached. Allow roughly two to four weeks for initial drying, depending on conditions. Look for papery skins and dry, rustling leaves before trimming the tops and storing somewhere cool and dry. Don’t pack freshly lifted bulbs into a closed box.
Leave a Reply